Follow these easy steps to show live captions in your Zoom Meeting:
1. Make sure captions are enabled on your Zoom account.
- Sign in to the Host account using the Zoom web portal
- Go to Settings → Meeting → In Meeting (Advanced).
- Scroll to Manual Captions and enable it.
- Check the boxes for:
- Allow host to type or assign a participant to type
- Allow use of caption API Token to integrate with 3rd-party Closed Captioning services
- Enable Full transcript and Save Captions.
2. Schedule your Zoom Meeting at https://zoom.us/meeting as you normally would in the “My Meetings” tab and click “Save.” This will automatically bring you to the “Manage My Meeting” view of your meeting. Click the “Start this Meeting” button at the top or bottom of this page:
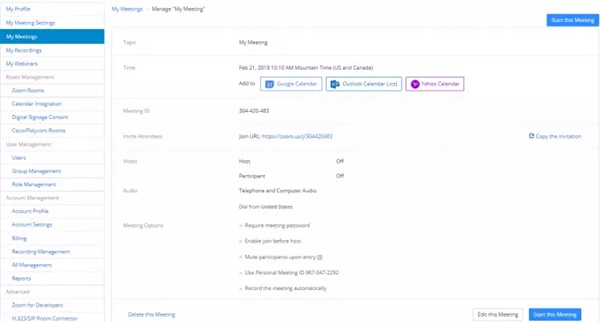
3. Once you’ve clicked “Start this Meeting”, your next screen will look like this:
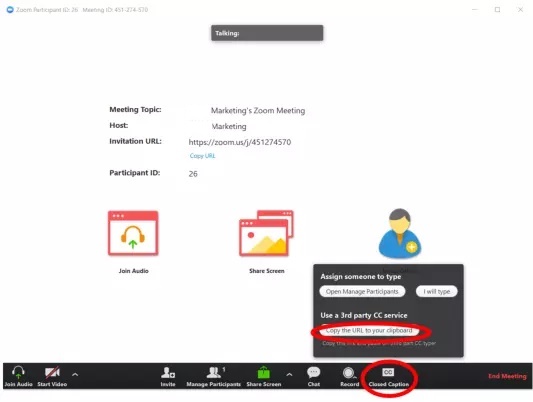
Click the “Closed Caption” button located in the menu bar at the bottom of the page. In the window that comes up, click "Use Third Party CC". A link will be copied to your clipboard. Send that link to Archive when you are scheduling captioning for your meeting. This link is specific to each session so be sure not to change the session or you will need to resend the link.
* Once you have copied the URL to your clipboard, the website link you provide to Archive will be long and start like this: https://wmcc.zoom.us/closedcaption?id=
4. Zoom Captioning then appears at the bottom of your screen and are accessible to your meeting participants by clicking the “CC” icon (the icon will be green once the captioner is ready):
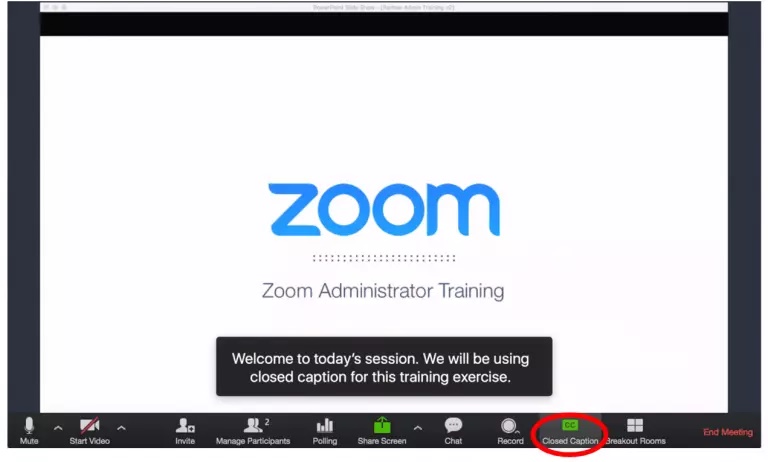
Once your meeting is complete, click “CC” at the bottom of your page before exiting this screen.
If you have any questions about live captioning in Zoom, please contact us at This email address is being protected from spambots. You need JavaScript enabled to view it. or call us at 800-870-1795.
